For the first decade of Barry J. Glaser’s private practice, he was like every other orthodontist around. His practice centered on treating patients with traditional brackets and wires. And those tools dictated not only how he treated patients, but how he did business—from staffing to scheduling.
But in the early 2000s, Glaser heard of a new product that could take the place of traditional brackets and wires. That product wouldn’t necessarily change how he treated patients, but it would change how he ran his business and how successful it would become.
Building a Practice
In 1988, Glaser received his DMD from the University of Pennsylvania School of Dental Medicine and then went on to complete a 1-year residency at Englewood Hospital in New Jersey. From there he accepted a postdoctoral appointment in orthodontics at Boston University (BU), earning his specialty certification in 1992. But he didn’t jump into a private practice from there. Instead, he stayed in academics.
“I had a great opportunity to become a professor early in my career,” he says. “I became associate director of orthodontics at Montefiore Medical Center, where I had the chance to teach and conduct research. I also had a private practice in the hospital one day a week.”
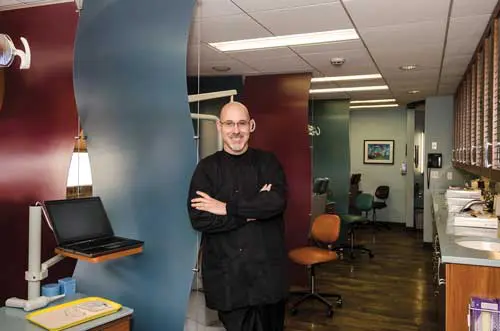
For 3 years, Glaser honed his lecturing and teaching skills before shifting gears and purchasing his current practice in 1995 in the Westchester County suburb of Cortlandt Manor, NY.
During the first few years in practice, Glaser primarily employed the bidimensional technique, which he learned at BU under Professor Anthony Gianelly, DMD, PhD, MD. “Gianelly was truly one of the gods of orthodontics,” Glaser says. But growing the practice in those early years proved to be challenging for Glaser’s private practice.
“From 1995 until 2006, only about 15% of my patients were adults,” he says. While adults wanted and needed straight teeth and healthier occlusions, many were reluctant to consent to wearing traditional braces. “For example, a 50-year-old male who hadn’t smiled his entire adult life came to me for treatment. I told him in 12 to 15 months his teeth would be straight. But the thought of wearing braces proved to be a deal-breaker [for him]. His appearance affected his career and his life, but he couldn’t put up with braces,” Glaser noted. “Even a removable appliance was unacceptable for this patient.” Not only were Glaser’s patients frustrated, but he was as well.
As he considered how to expand his practice, Glaser heard of a new treatment tool: The Invisalign® system, introduced by Align Technology Inc, San Jose, Calif, in 1999. But Gianelly had instilled in him the importance of questioning innovation and seeking proof before accepting new ideas, a lesson he took seriously. “I thought it would be a disaster. I figured I’d let everyone else make mistakes with it,” Glaser says. “I didn’t think you could control the movement of teeth [with aligners] as well as you could with braces.”
By 2006, Invisalign seemed to be gaining acceptance in orthodontic circles, so Glaser decided to test the waters. “I still viewed this as a removable appliance for simple tooth movement, and I was skeptical of the results,” he says.
To his surprise, his adult patients complied with treatment. The absence of metal wires and brackets, coupled with minimal irritation or discomfort, made a difference. “I was surprised and pleased. Gradually, I increased the complexity of the cases I was treating.”
Today, Glaser reports that 99% of his adult patients use Invisalign and typically ask for it by name.
Treating Teens
As for the younger demographic: Glaser treats a significant number of adolescents and teens, and he classifies these younger patients into two different groups. His pre-teen patients—those between 10 and 12 years of age—typically prefer traditional metal braces. “At that age, kids think braces are cool. They want to belong to their peer group. Girls, especially, are excited to have braces.” He explains that the pink and purple colors hold great appeal for this age group. “Some parents who had braces want their children to also have braces,” Glaser adds.
But by the time a youngster reaches the age of 13, he or she may be embarrassed by metal wires and brackets and will instead prefer a more unobtrusive option. Before the dawn of Invisalign, Glaser would use ceramic braces for some teens, but few choose that option nowadays.
In 2008, when Invisalign introduced a teen version of the product, Glaser again expressed skepticism. Although he had success treating adults, he foresaw bigger challenges with his younger patients. “Teens are more independent and question authority. I thought compliance would be an issue,” he says. Still, he decided to give Invisalign Teen® a try.
To his surprise, the teens were often more compliant than the adults. “There was no magic involved. It was a matter of psychology. You have to understand what motivates a patient. A 17-year-old cheerleader does not want to wear braces to her prom or for senior pictures. It’s incredibly motivating for patients like this to wear an invisible aligner.”
And just as Glaser expressed skepticism of these invisible aligners at first, many parents also needed to be convinced that this treatment option would be good for their children. “Parents sometimes have objections to the aligners. We take the time to explain all the benefits of Invisalign and debunk the myths,” Glaser says.
For those parents who remain skeptical—whether it be that they don’t think it’s going to be as effective or they fear their child will lose or forget to wear their aligners and ultimately need to be treated with braces anyway—Glaser makes a deal with them. “I tell parents it won’t cost you a penny [if we need to switch to braces]. If for any reason Invisalign doesn’t work for you or your child, we’ll switch you over to braces at no charge. Crazy? Maybe. But we’ve tracked it, and it happens in less than one-half of 1% of all cases. To me, it’s worth it to get all those other patients into Invisalign. So parents say, ‘OK. Sounds good.’ And lo and behold, those kids are doing great.”
Scientific Evidence
However, Glaser’s complete conversion to Invisalign didn’t occur until 2010, 4 years into using Invisalign, when he attended a 2-day summit in Las Vegas. This particular conference featured John Morton, director of research and technology product innovation at Align Technology, who is largely responsible for the science behind Invisalign.
Up until the summit, Glaser had only been using Invisalign as he would a retainer—for minor tooth movement. “I wasn’t looking to change malocclusions because I didn’t think it could.”
The presentations and scientific evidence featured at the summit impressed Glaser. “For the first time, Align was doing physical measurements and following scientific principles. They developed an electronic typodont, where aligners can be placed on the teeth and they can measure the forces being generated at the level of the roots to produce the desired tooth movements,” he recalls.
Listening to the lectures, Glaser had an a-ha moment that changed everything. “I realized mechanically and biologically that what you could do with Invisalign was the same as what you could do with braces. The only reason I wasn’t addressing patients’ malocclusions with Invisalign was because I didn’t think you could. So once I realized that it’s the same mechanics—that you would set up patients the same way you would with braces—things really started to take off for me.”
Glaser now realized that Invisalign wasn’t a technology he could ignore, no passing fad. For him, it was the future of orthodontics. Given that, he saw an opportunity to differentiate his practice, setting out to become the first Elite Preferred provider in the Westchester area—a status that requires an orthodontist to start 50 Invisalign cases every 6 months.
Transitioning a Business
When any business incorporates a new product into its routine, it is going to have an impact on efficiency and profits. The challenge then is to correctly integrate that new technology so that the impact is positive and helps the business succeed.
Fully diving into Invisalign meant Glaser was taking a risk; the most obvious being the financial investment Invisalign carries, as lab fees and product costs run higher than traditional braces. He also made the decision to invest in an iTero® scanner, as he admits that taking PVS impressions was challenging for him and his staff, while his patients found the experience to be unpleasant.
However, once Glaser grew his number of Invisalign starts, he saw the product cost mitigated with Align Technology’s volume rebates. The financial cost of the iTero scanner was also mitigated with a federal IRS section 179 tax credit that allows a practice to write off the full amount of certain capital expenses in one year. When asked whether he thinks a practice needs to buy the iTero to reap all the benefits of incorporating Invisalign, he answers, “I think it’s worth every penny. The scans are dead-on accurate. The aligners fit better, and you don’t have to deal with rejected impressions. And patients are amazed by the technology. Plus, it is super-efficient. If you are going to look to try and make your appointments and your office as efficient as possible, it’s very helpful.”
Going beyond the initial equipment investment, Glaser had to look at the financial impact from a different angle. As with the integration of any new technology, the reduction in product cost wasn’t going to be what made his practice profitable and successful.
“It dawned on me that profitability in my practice wasn’t just the expense side of the balance sheet—and I think that’s what a lot of orthodontists focus on,” Glaser recalls. “They see the lab fee and think, ‘My lab fee is going to be three times as much with Invisalign. I’m going to make three times less money.’ But what about the other side of the balance sheet? What about staff? What about the number of days you work? What about emergency appointments and all those other inefficiencies? I realized that if I was going to be profitable with Invisalign, I really had to go back and look at what we were doing in the office and clean up everything. I had to streamline the office to be as efficient as possible.”
With Invisalign, patients not only required 40% fewer visits than with braces, they were also less likely to require emergency appointments. Glaser is quick to stress the importance of re-evaluating appointment scheduling to truly maximize the benefit of any new technology that makes appointments more efficient.
“Don’t just keep seeing the patient once a month because that’s what you learned in dental school. You have to really sit down and think about why you do the things you do in your office. I can assure you, if the patients are wearing their aligners well and coming in once a month, they will wear their aligners well coming in every 3 months,” Glaser says. “And I have never had a patient or parent say, ‘I can’t believe we’re only coming in four times a year. You’re ripping us off!’ Parents and kids are super scheduled and super busy. Parents appreciate that.”
With the freeing up of the schedule, Glaser also had to re-evaluate his staffing levels, and he realized he no longer needed to maintain his old numbers. Fortunately, he was able to reduce his staff from six to four through attrition—retirement and career changes—rather than layoffs. In real numbers, between salary and benefits in NY, cutting those two positions resulted in about $120,000 per year in true savings, more than making up the difference in additional lab fees, he says. And the opportunities for the practice to profit from a staff perspective didn’t stop there. Now that they weren’t so busy, staff had time to take on some of the marketing tasks that make a practice successful—from updating the practice’s Facebook page to visiting referring offices.
And there is another marketing angle that comes with a product like Invisalign that goes beyond just having more time in the office to better market the practice. Not only does Align Technology provide users with numerous free or low-cost marketing materials—from brochures and posters for the office to professionally shot patient testimonials for the practice website, it has also positioned Invisalign as a household name with TV and print ads targeting both parents and teens. Patients walk into orthodontic offices asking for it by name.
What’s more, by becoming an Elite provider, Glaser’s practice is listed on the Invisalign website’s Doctor Locator tool, which allows those patients looking specifically for Invisalign to find a doctor in their area who can do it. Glaser has seen this marketing tool pay off for his practice. At least two times a month, he receives an email from a potential patient saying they found him on the Doctor Locator site. “Those patients are real patients,” Glaser says. “That’s 20 to 25 patients per year being driven to my office through the website.”
Moreover, Glaser benefits from being listed as the No 1 provider in his area. He tells the story of a 13-year-old boy who came in with his mother looking for treatment with Invisalign. The mother and son were from a town that was some distance away. “You drove past five orthodontist’s offices to get to my office. What are you doing all the way over here?” he remembers asking. “And the kid looks up at me and says, ‘You’re the No 1 doctor.’ They had seen me on the Doctor Locator. Parents don’t want to go to No 5 for their child. They want to go to No 1.”
As Glaser treated more teens, he soon saw how they were becoming “brand ambassadors,” not just for Invisalign, but also for his practice. “When you think about it, it’s just like anything else. My boys only want to wear the Jordan’s [basketball sneakers]—they have to have the swosh. And I was the same way [as a kid]. I wanted the Levi’s. Kids are, for better or worse, incredibly impressionable, incredibly brand motivated, and incredibly brand loyal. So once Invisalign starts to become a thing, that’s what they want—like any other fashion,” he says.
Glaser adds that, “Only 5% of teens in the United States are currently being treated with Invisalign. As I [speak about it], I emphasize the huge opportunity for orthodontists to market Invisalign to teens and their parents. It has helped keep my practice competitive.”
He has used Invisalign as a way to turn school nurses and hygienists into brand ambassadors as well. “We market a lot to the hygienists, especially [for the hygiene benefits of Invisalign]. They love it. They love that they don’t have to clean between brackets and wires. So, we offer to treat hygienists at a reduced fee because we want them to be our ambassadors. We also sponsor a hygienists’ appreciation breakfast once a year and educate them about the many benefits of Invisalign.”
Beyond having more time for marketing, the reduction in patient visits also meant that there was more time to do patient consults. Prior to Invisalign, there was a 4-week wait list. As a result, many patients called up other orthodontists for an appointment. That wait list has now been reduced to less than 1 week, Glaser says.
And even with the time for more patient consults, Glaser, a married father of two boys, has still been able to reduce his work schedule from 16 to 18 days per month to 12 to 14 days per month. All this freed-up time has had a huge impact on Glaser’s practice and his work life. “With that free time, I could choose to open a satellite office or spend more time with my family or pursuing hobbies. I could use the time to drive the growth of the practice and do things that make you successful, like networking or sponsoring a Lunch and Learn.”
Even though using the free time to open a second office would have upped the profitability potential that came with changing his practice, Glaser decided to spend the additional free time learning to play the guitar, riding his Harley-Davidson motorcycle, and returning to his academic roots by lecturing instead. Since becoming an Elite Invisalign provider, Glaser has been delivering educational lectures about the product first in the northeast and then across North America. Last year, he gave more than 40 talks at a variety of conferences and meetings. “I have been involved with orthodontic education for over 20 years,” Glaser says. “I thoroughly enjoy giving something back to my peers in the orthodontic community.”
Four years after his decision to convert his practice, approximately 75% of Glaser’s current patients opt for the Invisalign system. His decision to take the leap and radically change the way he practiced has been career defining, and, more importantly, successful.
For other orthodontists to experience the same success with Invisalign or with the introduction of any other new technology into their practice, Glaser reiterates the importance of changing the way you think to reap the best rewards. “If you basically use your bracket and wire paradigm with Invisalign, you’re still probably going to be happier because you are going to have an easier day. But if you are looking to make it as profitable as possible, you need to make some simple changes. Think about all those things you do just because that’s what you do. It’s not necessary.”
In the end, an appliance change or adoption of a new technology does not determine success in and of itself. They are merely tools, Glaser emphasizes. “The skill and training you have as a doctor provides the best outcome. My number one priority is to do the best orthodontics on every patient that walks through the door. This helps my practice grow.”
Source: http://www.orthodonticproductsonline.com/2014/06/skeptic-elite